YesManJr's_Cohort
Senior Member
I thought I'd make this sig tutorial for the beginner sig makers with no special programs.Your sigs won't come out as great as sigs made with an advanced program, but you can make some pretty sweet stuff.
Step 1
Choosing a background
The first thing you should do is open an MS Paint program, and since we can't really make any cool backgrounds with MS Paint, I'd suggest going to Google Image Search to find a cool one.Just search for "cool background" or "blue background" or something like that.Once you get the image you want, copy and paste it into MS Paint.
Click here
Step 2
Finding the right size
Once you have your background pasted, you now have to use the square cutting tool thing (the one on the top right) to find the right size, then put the image you cut out below the left overs of the background.Then get rid of all the stuff you don't need.
Click here
Step 3
Finding pictures for your sig
The next thing you need to do is put pictures on your sig.The easiest way to do this if you want sprites is to go to the spriter's resource.But if you want actual pics, google is the best place.I would suggest searching for the image you want and put "gif" at the end.This will make google search only for images that are saved to a gif format.Most gif images don't have all the white crap that you don't need.But if you do have an image with white crap, here's what you do.
Copy and paste the image into MS Paint.Draw a circle around the image and use the paint bucket tool to fill in the circle.I'd suggest filling it in with either bright green or pink, colors you wouldn't normally have in the picture.Then use the paint brush tool to color in all the white stuff.After that, paint bucket the area where you painted white.
Click here
Step 4
Adding Pictures
Once you have all the pictures you want in your sig on the screen, just drag them and drop them where you want them on your sig.Then get rid of the left over part of the object/character.
Click here
Click here
Step 5
Adding Text
To add text, use the text tool and click and drag the cursor across the whole sig.This way it will be easier to position the text where you want it.Then just type what you want and pick a color that you can see clearly.
Click here
That's it!Now you're done!Just highlight the whole image with the sqaure tool and cut it out.Then go to image, attributes and select 1 x1.Now paste your sig in and there it is!

Other stuff made with MS Paint:


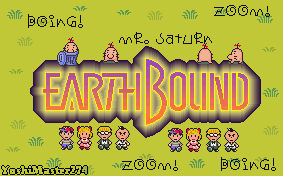


Even with MS Paint, you can still make something great!
So, was that helpful?
If you have any questions, ask away! I know that wasn't as clear as it could've been.
Step 1
Choosing a background
The first thing you should do is open an MS Paint program, and since we can't really make any cool backgrounds with MS Paint, I'd suggest going to Google Image Search to find a cool one.Just search for "cool background" or "blue background" or something like that.Once you get the image you want, copy and paste it into MS Paint.
Click here
Step 2
Finding the right size
Once you have your background pasted, you now have to use the square cutting tool thing (the one on the top right) to find the right size, then put the image you cut out below the left overs of the background.Then get rid of all the stuff you don't need.
Click here
Step 3
Finding pictures for your sig
The next thing you need to do is put pictures on your sig.The easiest way to do this if you want sprites is to go to the spriter's resource.But if you want actual pics, google is the best place.I would suggest searching for the image you want and put "gif" at the end.This will make google search only for images that are saved to a gif format.Most gif images don't have all the white crap that you don't need.But if you do have an image with white crap, here's what you do.
Copy and paste the image into MS Paint.Draw a circle around the image and use the paint bucket tool to fill in the circle.I'd suggest filling it in with either bright green or pink, colors you wouldn't normally have in the picture.Then use the paint brush tool to color in all the white stuff.After that, paint bucket the area where you painted white.
Click here
Step 4
Adding Pictures
Once you have all the pictures you want in your sig on the screen, just drag them and drop them where you want them on your sig.Then get rid of the left over part of the object/character.
Click here
Click here
Step 5
Adding Text
To add text, use the text tool and click and drag the cursor across the whole sig.This way it will be easier to position the text where you want it.Then just type what you want and pick a color that you can see clearly.
Click here
That's it!Now you're done!Just highlight the whole image with the sqaure tool and cut it out.Then go to image, attributes and select 1 x1.Now paste your sig in and there it is!
Other stuff made with MS Paint:
Even with MS Paint, you can still make something great!
So, was that helpful?
If you have any questions, ask away! I know that wasn't as clear as it could've been.
")


")


 Yeah, Piranha and I have that.